Ein BeeWi-Auto mit Xamarin iOS steuern
Lerne in 5 einfachen Schritten, wie Bluetooth und das External Accessory Framework zusammenspielen, um ein BeeWi-Auto mit Xamarin.iOS zu steuern.
Lerne in 5 einfachen Schritten, wie Bluetooth und das External Accessory Framework zusammenspielen, um ein BeeWi-Auto mit Xamarin.iOS zu steuern.
Falls dich die Android-Variante interessiert: Dieses Thema habe ich bereits in Ein BeeWi Car mit Xamarin.Android steuern behandelt. Bevor ich anfange: Das ist mein erster englischer Artikel gewesen, daher bekommt die deutsche Version hier nun ihren Platz im de-Verzeichnis.
Öffne Xamarin Studio und erstelle ein neues iOS-Projekt mit der Vorlage deiner Wahl. Ich verwende und empfehle die Vorlage Single View Application aus dem Ordner Unified API iPhone. Die neue Unified API brachte damals neben einigen weiteren Verbesserungen 32-Bit- und 64-Bit-Unterstützung mit, die Apple ab Februar 2015 für alle Apps verlangte.
Im neu angelegten Projekt findest du die Datei Mainstoryboard.storyboard. Ein Doppelklick darauf öffnet den Xamarin.iOS-UI-Designer. Gestalte die Oberfläche so, wie du möchtest, aber denke daran, dass wir mindestens die folgenden Befehle senden können müssen:
Wie man an meiner Oberfläche sieht, bin ich kein Designer. 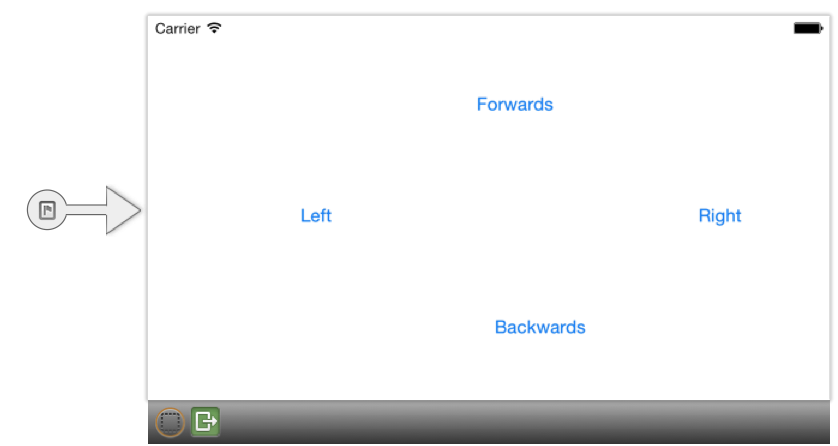
Sobald es eine Oberfläche gibt, über die Befehle an das BeeWi-Auto gesendet werden können, ist es Zeit, die Kommunikation zwischen Spielzeug und Gerät umzusetzen. iOS stellt dafür verschiedene APIs bereit, je nachdem, was man erreichen möchte.
In diesem Fall brauchen wir das External Accessory Framework. Ein Zubehörteil repräsentiert in iOS ein Gerät, hier also das Auto, das mit einem iPad oder iPhone gekoppelt ist. Da mehrere Zubehörteile verbunden sein könnten, müssen wir zunächst das richtige finden.
var connectedAccessories = EAAccessoryManager.SharedAccessoryManager.ConnectedAccessories;
EAAccessory beeWiCar = null;

foreach (var accessory in connectedAccessories)
{
    foreach (var protocolString in accessory.ProtocolStrings)
	{
		protocolString.Contains("com.beewi.controlleur");
		beeWiCar = accessory;
		break;
	}
}
Nachdem wir das Auto gefunden haben, müssen wir eine Kommunikationssitzung öffnen. Diese Sitzung wird im External Accessory Framework durch EASession repräsentiert. Sie erlaubt es, Daten vom Zubehör zu lesen oder dorthin zu schreiben. Um eine Sitzung zu starten, übergibst du dem Konstruktor von EASession das Zubehör und das Protokoll. Anschließend können die Streams zum Lesen und Schreiben geöffnet werden.
if (beeWiCar != null)
{
	try
    {
		session = new EASession(beeWiCar, "com.beewi.controlleur");
		session.Accessory.Disconnected += delegate
		{
			CloseSession();
			new UIAlertView("BeeWi Car", "BeeWi car disconnected", null, "OK").Show();
		};

        session.InputStream.Schedule(NSRunLoop.Current, NSRunLoop.NSDefaultRunLoopMode);
        session.InputStream.Open();

        session.OutputStream.Schedule(NSRunLoop.Current, NSRunLoop.NSDefaultRunLoopMode);
		session.OutputStream.Open();
    }
	catch (Exception ex)
	{
		new UIAlertView("BeeWi Car", "Ups something went wrong.", null, "OK").Show();
    }
}
else
{
	new UIAlertView("BeeWi Car", "No BeeWi car connected", null, "OK").Show();
}
Jetzt, da die Verbindung zum BeeWi-Auto steht, können wir die Buttons verdrahten, zum Beispiel so:
btnForward.TouchDown += delegate
{
    SendCommand(BeeWiCarCommands.Forward_Go);
};

btnForward.TouchUpInside += delegate
{
    SendCommand(BeeWiCarCommands.Forward_Stop);
};
Jedes Mal, wenn du einen Button drückst, wird der dazugehörige Befehl über die Methode SendCommand verschickt. Wir müssen aber auch immer ein Signal senden, das dem Auto sagt, dass es wieder stoppen soll. Das sollte man im Hinterkopf behalten.
Die Methode SendCommand prüft zunächst, ob die Sitzung noch aktiv ist und das Auto verbunden ist, und sendet danach den Befehl.
void SendCommand(BeeWiCarCommands command)
{
	try
	{
		if (session == null)
	    {
            new UIAlertView("BeeWi Car", "No connection established", null, "OK").Show();
            return;
		}

	    if (!session.Accessory.Connected)
        {
			new UIAlertView("BeeWi Car", "Car not connected", null, "OK").Show();
			return;
		}

		session.OutputStream.Write(new byte[]{ (byte)command }, 0, 1);
	}
    catch (Exception ex)
    {
		new UIAlertView("BeeWi Car", ex.Message, null, "OK").Show();
	}
}
Eine letzte Sache musst du noch tun, damit du das BeeWi-Auto mit deinem iPhone oder iPad steuern kannst: Registriere das Protokoll com.beewi.controlleur in deiner App. Öffne dazu die Datei Info.plist, wechsle in den Reiter Source und füge einen neuen Eintrag vom Typ Supported external accessory protocols hinzu. Als Wert trägst du com.beewi.controlleur ein.
Mit diesem kleinen Spielzeug zu experimentieren und es über eine selbst geschriebene App zu steuern, macht wirklich Spaß. Und mit dem External Accessory Framework ist es erstaunlich einfach, auf iOS mit verbundenen Geräten zu arbeiten. Das ist auch ein guter Einstieg, um mehr über Sensoren und Gerätesteuerung zu lernen. Stell dir zum Beispiel vor, du würdest das Auto per Touch oder über die Bewegung des Telefons steuern. Das wäre Stoff für einen weiteren Artikel.
Wenn du ein eigenes Projekt mit ähnlicher Hardware-Anbindung planst, lass dir deine iOS App entwickeln oder setze direkt auf eine plattformübergreifende App, die iOS und Android mit einer gemeinsamen Codebasis bedient.
Den vollständigen Code findest du auf bitbucket.
Erstellen Sie eine iOS-App, bauen Sie eine einfache Oberfläche mit Steuerungsbuttons, verbinden Sie sich über das External Accessory Framework mit dem BeeWi-Auto und senden Sie die Fahrbefehle über eine EASession an das gekoppelte Zubehör.
Das External Accessory Framework ist eine iOS-API, mit der Apps mit gekoppeltem externem Zubehör kommunizieren können. In diesem Fall wird es genutzt, um das BeeWi-Auto über das registrierte Protokoll anzusprechen.
Öffnen Sie die Info.plist, wechseln Sie in die Quellansicht und fügen Sie unter den unterstützten Protokollen für externes Zubehör den Eintrag com.beewi.controlleur hinzu.

Als Mobile-Enthusiast und Geschäftsführer der Cayas Software GmbH ist es mir ein großes Anliegen, mein Team und unsere Kunden zu unterstützen, neue potenziale zu entdecken und gemeinsam zu wachsen. Hier schreibe ich vor allem zur Entwicklung von Android und iOS-Apps mit Xamarin und .NET MAUI.
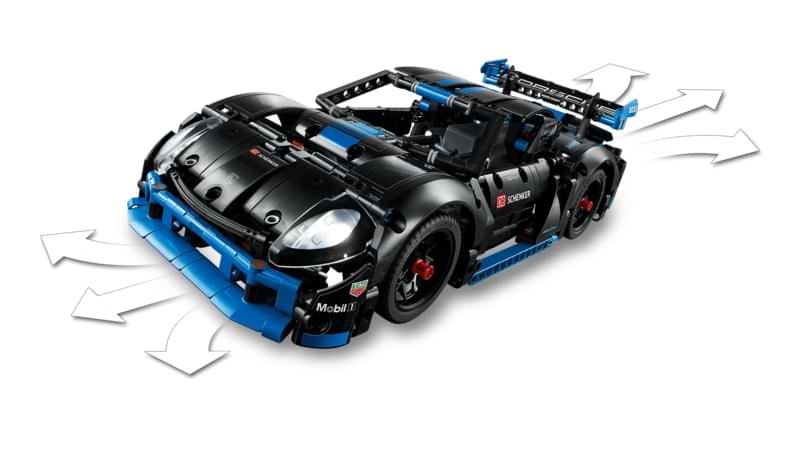
Bluetooth Low Energy mit .NET MAUI: Dieser Artikel zeigt, wie sich BLE-fähige Geräte plattformübergreifend für Android und iOS ansprechen lassen. Als Praxisbeispiel dient der LEGO Porsche GT4 e-Performance mit dem offiziellen LEGO Wireless Protocol, inklusive Hub-Service, Port-Erkennung und Motorsteuerung.
Kartenfunktionen sind im mobilen Bereich ein wichtiges Feature. Kaum eine App gewinnt nicht an Wert, wenn sie Karten darstellen kann. Apple und Google machen mit ihren Map-SDKs vieles richtig, aber manchmal stößt man an Grenzen - sei es aus rechtlichen Gründen oder wegen eines Bugs. In meinem Fall war Letzteres der Auslöser. Ich brauchte außerdem eine Alternative, die auch offline funktioniert.

Spracheingabe macht es möglich, gegessene und getrunkene Lebensmittel intuitiv zu erfassen, ohne ständig auf ein Gerät schauen oder tippen zu müssen. Statt alles mühsam per Hand einzugeben, können Nutzer Mahlzeiten und Snacks einfach per Sprache dokumentieren. Das spart Zeit und senkt die Hürde für eine regelmäßige Erfassung.